
NVIDIA Mosaic
Windows Desktop Spanning
Section titled “Windows Desktop Spanning”NVIDIA Mosaic is used to combine several projectors to a single, logical Desktop area. After that, all applications behave as if just one monitor exists. This is the behavior the end-user will expect as system behavior after a calibration.
These topologies can be set:
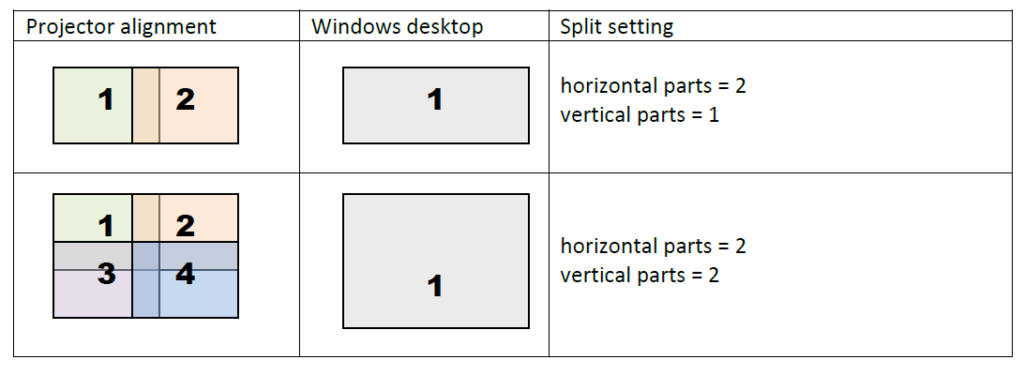
Mosaic topologies
After combining projectors like this, they are recognized from the operating system as a single, high-resolution display:
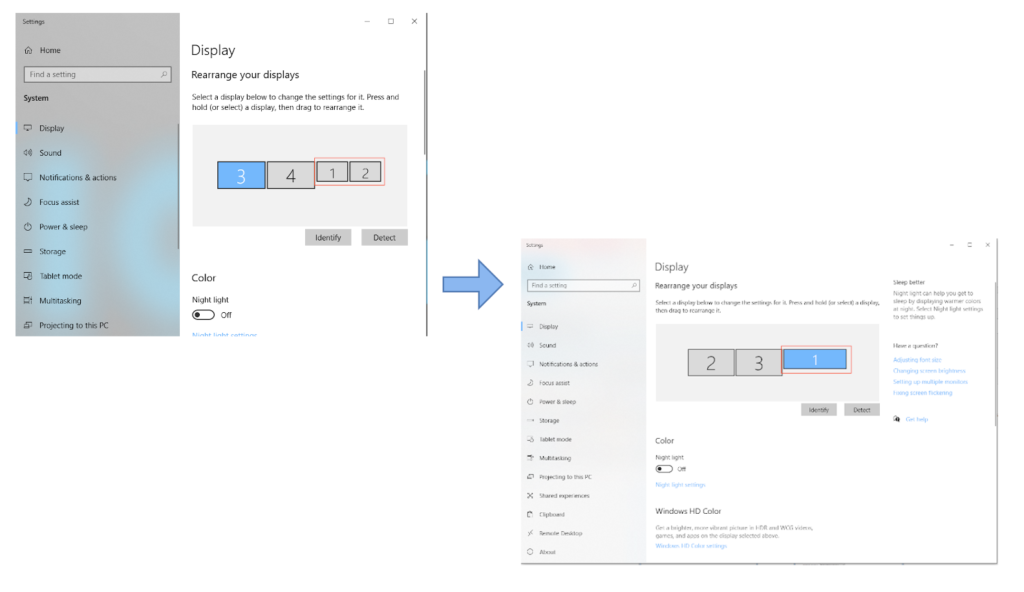
Example of using Mosaic on Display 1 & 2 (left image) to combine into a larger Display 1 (right image)
Step-by-step Guides
Section titled “Step-by-step Guides”Option 1: Mosaic Utility
Section titled “Option 1: Mosaic Utility”The following steps provide instructions on using the ConfigureMosaic.exe utility:
- Download the Mosaic Utility from the NVIDIA driver homepage. NOTE: This will be located under the Quadro Advanced Options bullet. Under the Utilities subheading you will find the Mosaic Utility for download: https://www.nvidia.com/en-us/drivers/mosaic-utility/
- Download “configureMosaic.exe,” using the “Download Now” button.
- The configureMosaic.exe utility must be run in a command window with administrator user privileges
- To find a list of commands for the ConfigureMosaic.exe utility run the following command:
C:\PATH\configureMosaic.exe help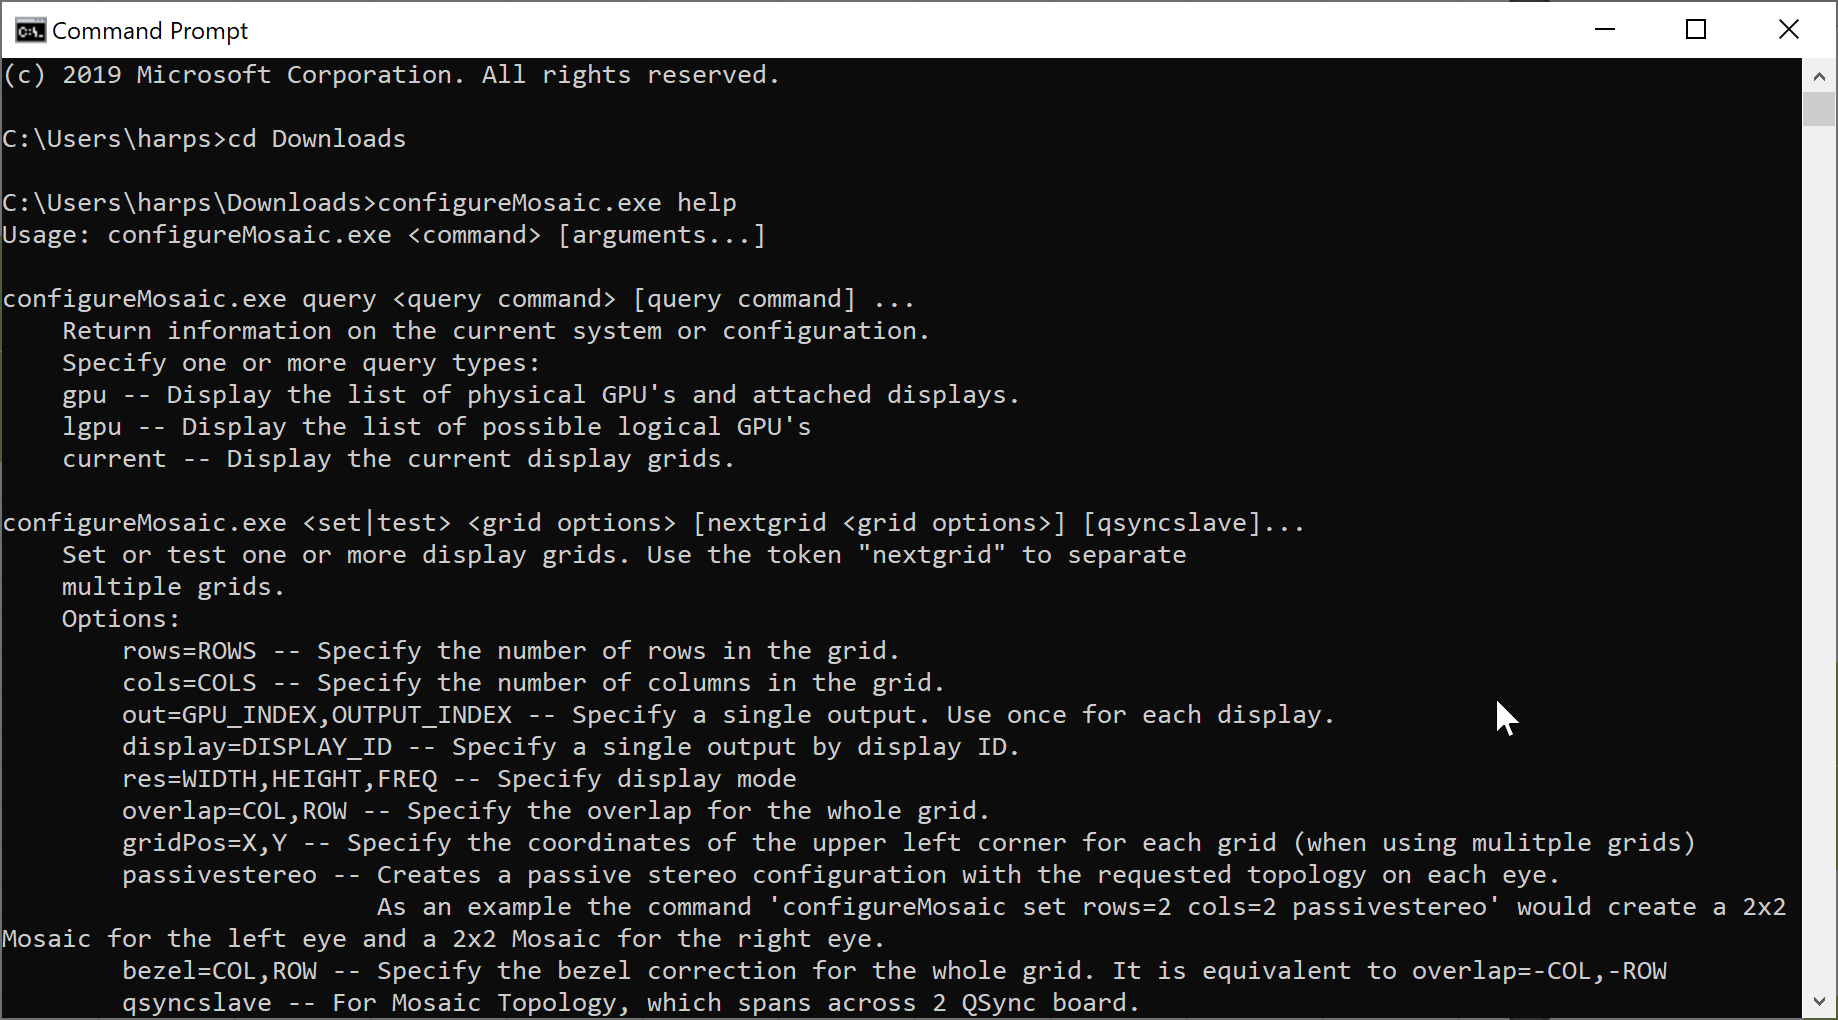
A basic setup for this would be a command based on the number of rows, columns, and desired resolution. If no resolution flag is set, the command will use the default native resolution of the monitors in the setup. For example:
C:\Path\ConfigureMosaic.exe set rows=2, cols=4 res=3840,2160,60will result in a Mosaic GRID of 8 monitors in total with 2 horizontal rows and 4 vertical columns:
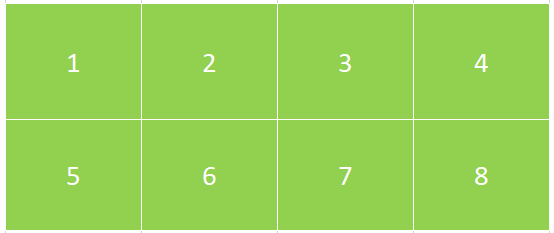
To help formulating the appropriate commands, we provide and online ConfigureMosaic commandline creator:
Online creator for configuremosaic.exe mosaic.vioso.com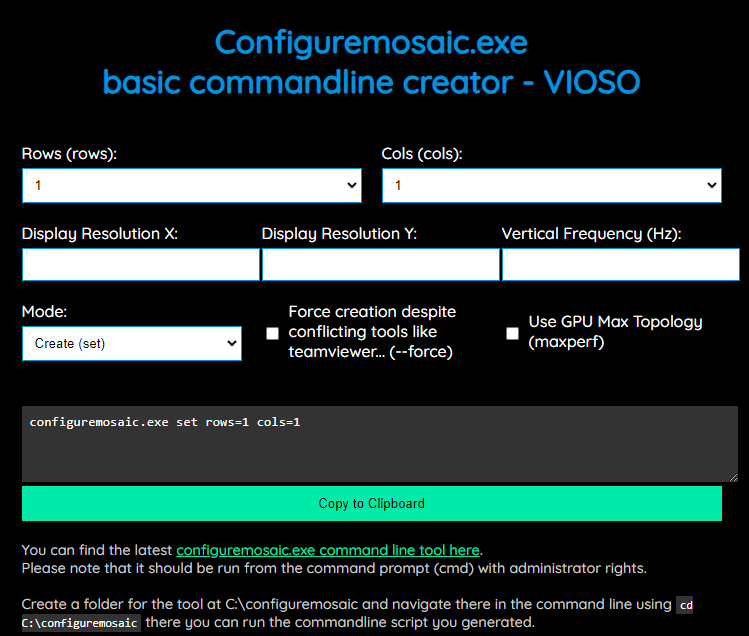
https://mosaic.vioso.com - online commandline generator for configureMosaic.exe
Option 2: NVIDIA control panel
Section titled “Option 2: NVIDIA control panel”The following steps provide instructions on setting up a Mosaic configuration using the NVIDIA control panel.
-
From the Select a Task navigation pane, under Workstation, click Set Up Mosaic to open the associated page.
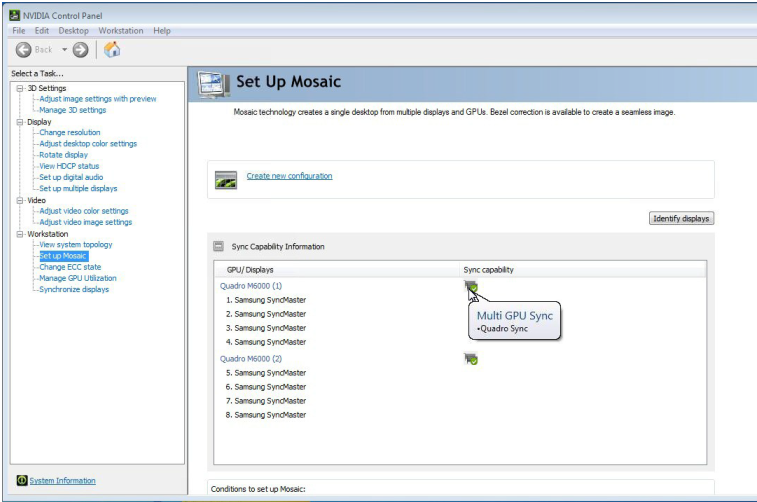
NVIDIA Control Panel Set Up Mosaic Page
-
If not already expanded, click the Sync Capability Information icon (+) to expand the information box and see which GPUs in your system are able to synchronize multiple displays with each other.
NOTE: This box appears only if there is at least one sync-capable GPU in your system. -
Click Create a new configuration and then follow the steps in the Mosaic Configuration wizard as described in the following sections. You can create more than one Mosaic configuration depending on the displays that are connected.
-
Select Topology
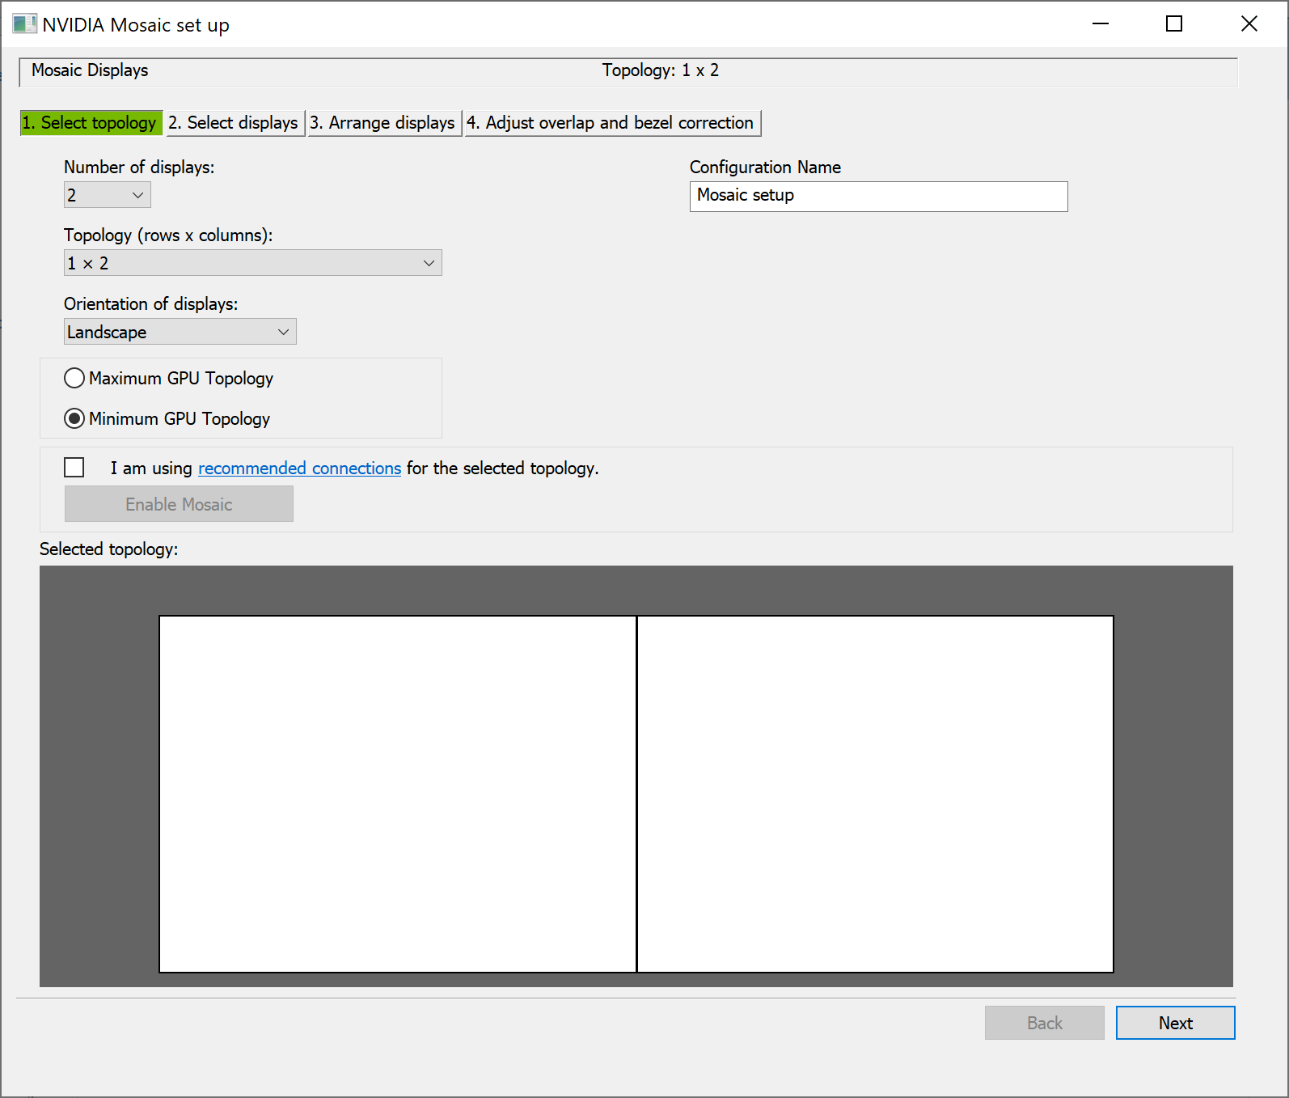
- Select the number of displays, the row x column topology, and the orientation of the displays. By default, the number of physically connected displays appears under Number of displays.
- Optionally enter a configuration name for this Mosaic configuration.
- Uncheck
I am using recommended connections for the selected topologyand click Next. - Select
Maximum GPU Topology
-
Select Displays
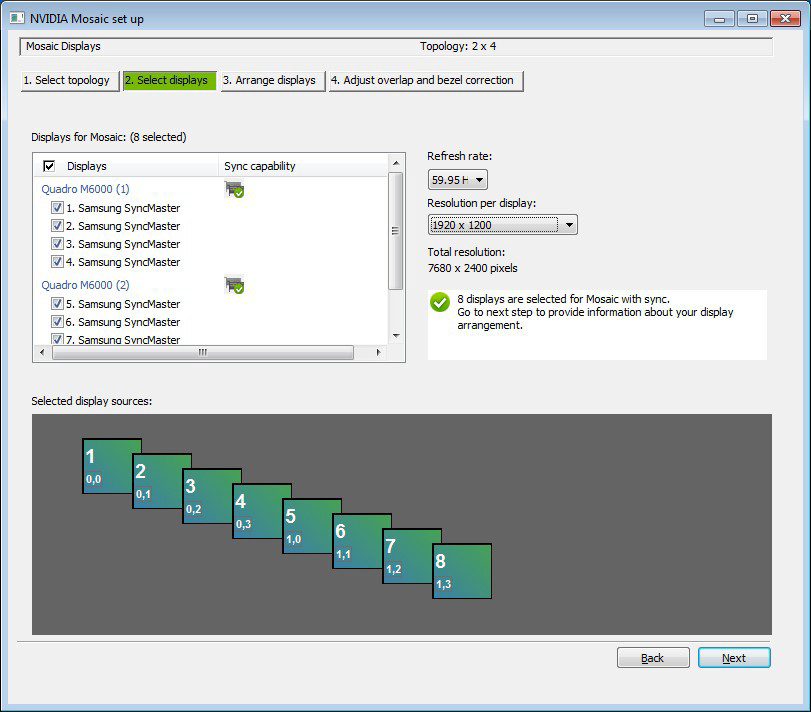
Select the displays to use, the refresh rate, and the resolution per display. Icons for each selected display will appear in the Selected display sources box.
-
Arrange Displays
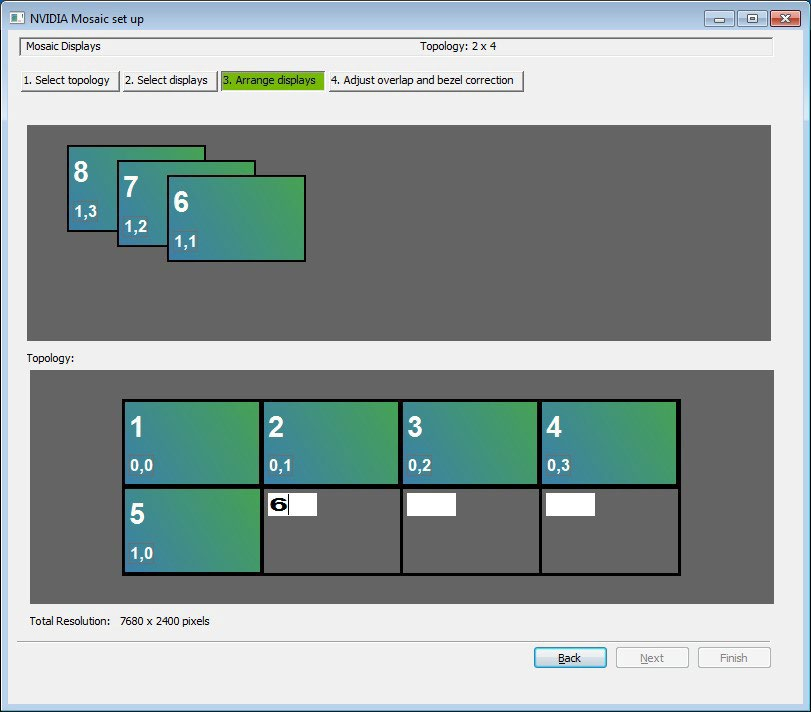
Arrange the display sources to match your physical displays by either dragging the icons from the Selected display source box to the desired position in the Topology box, or by entering the number for each display into the desired position in the Topology box. -
When completed, click Apply. Mosaic is activated after a while.
Official ressources
Section titled “Official ressources”PDF user guide “NVIDIA Mosaic Technology”:
https://images.nvidia.com/aem-dam/en-zz/Solutions/design-visualization/quadro-product-literature/NVMosaic-UG.pdf