
3D Mapping in Freemode
Once a calibration is done, you can align it using 3D model data and virtual camera positioning.
In order to perform 3D alignment, you will need:
- The initial calibration (completed) with blending. No VC adjustment and no warping.
- The 3D model of the screen with its UV map (refer to 3D Model Handling).
Workflow
Section titled “Workflow ”-
Load the calibration in VIOSO and activate it, so you can see the calibration result on the projectors.
-
Make sure the warping Virtual Canvas (VC) is untouched and it is set by default to full screen.
-
Open the
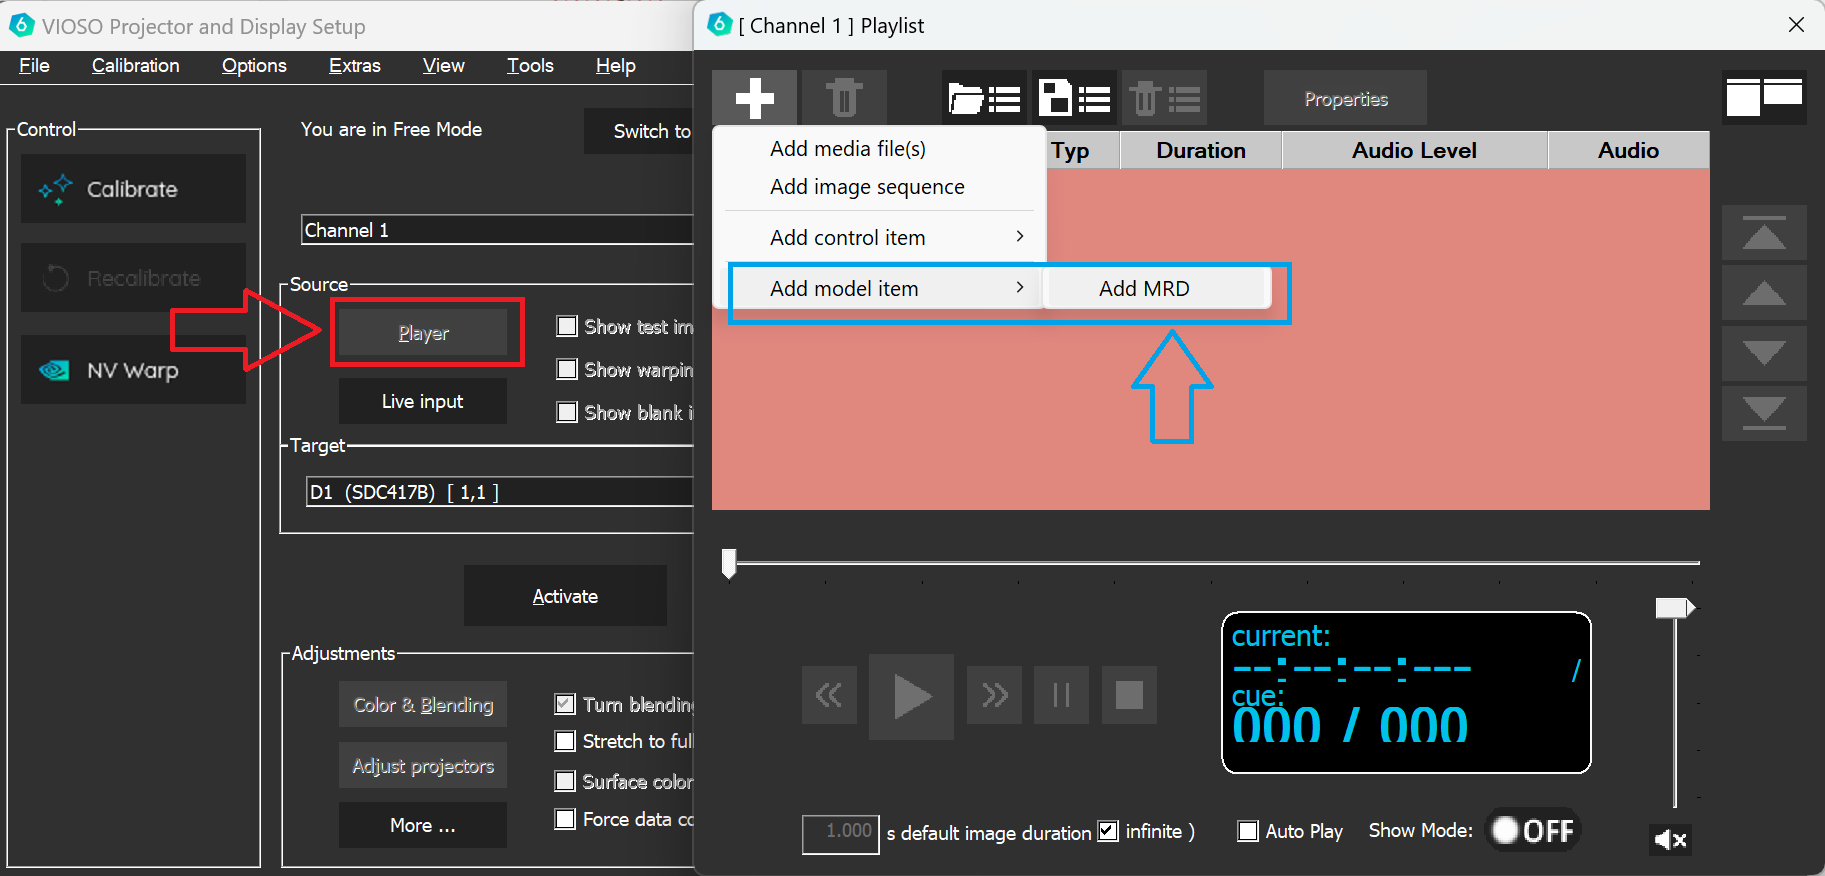
Playerwindow. On the main menu, click the plus icon. Then chooseAdd Model ItemthenAdd MRD– give it a name — this will create an MRD file in the playlist. -
Double-click on it to activate it, so it is in “playing” status:
-
On the main window, un-check the
Show test imagecheckbox, as this test pattern will always be shown on top of playlist content. -
Click
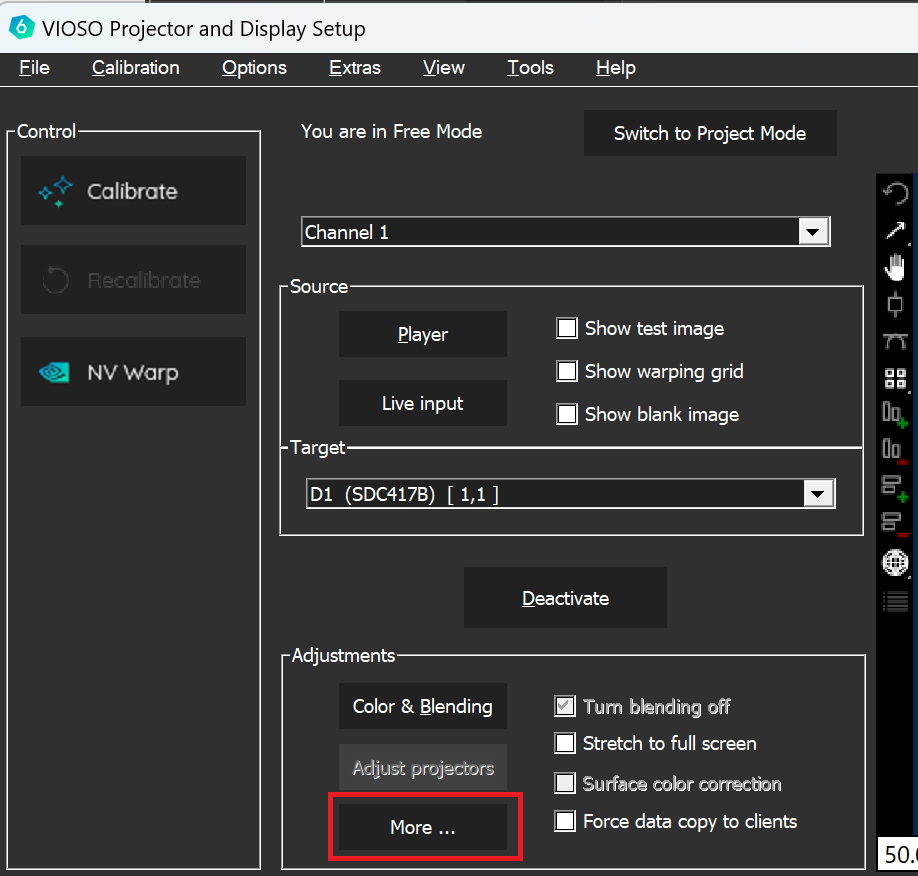
More...menu on the main window and choose3D Mapping.
-
Align the virtual camera parameters to your real calibration camera measurements. Refer to the section . for details and examples.
-
The 3D alignment is now finished, you can proceed by performing the conversions: Step 4: Final conversions