
Custom 3D Model preparation for calibrations
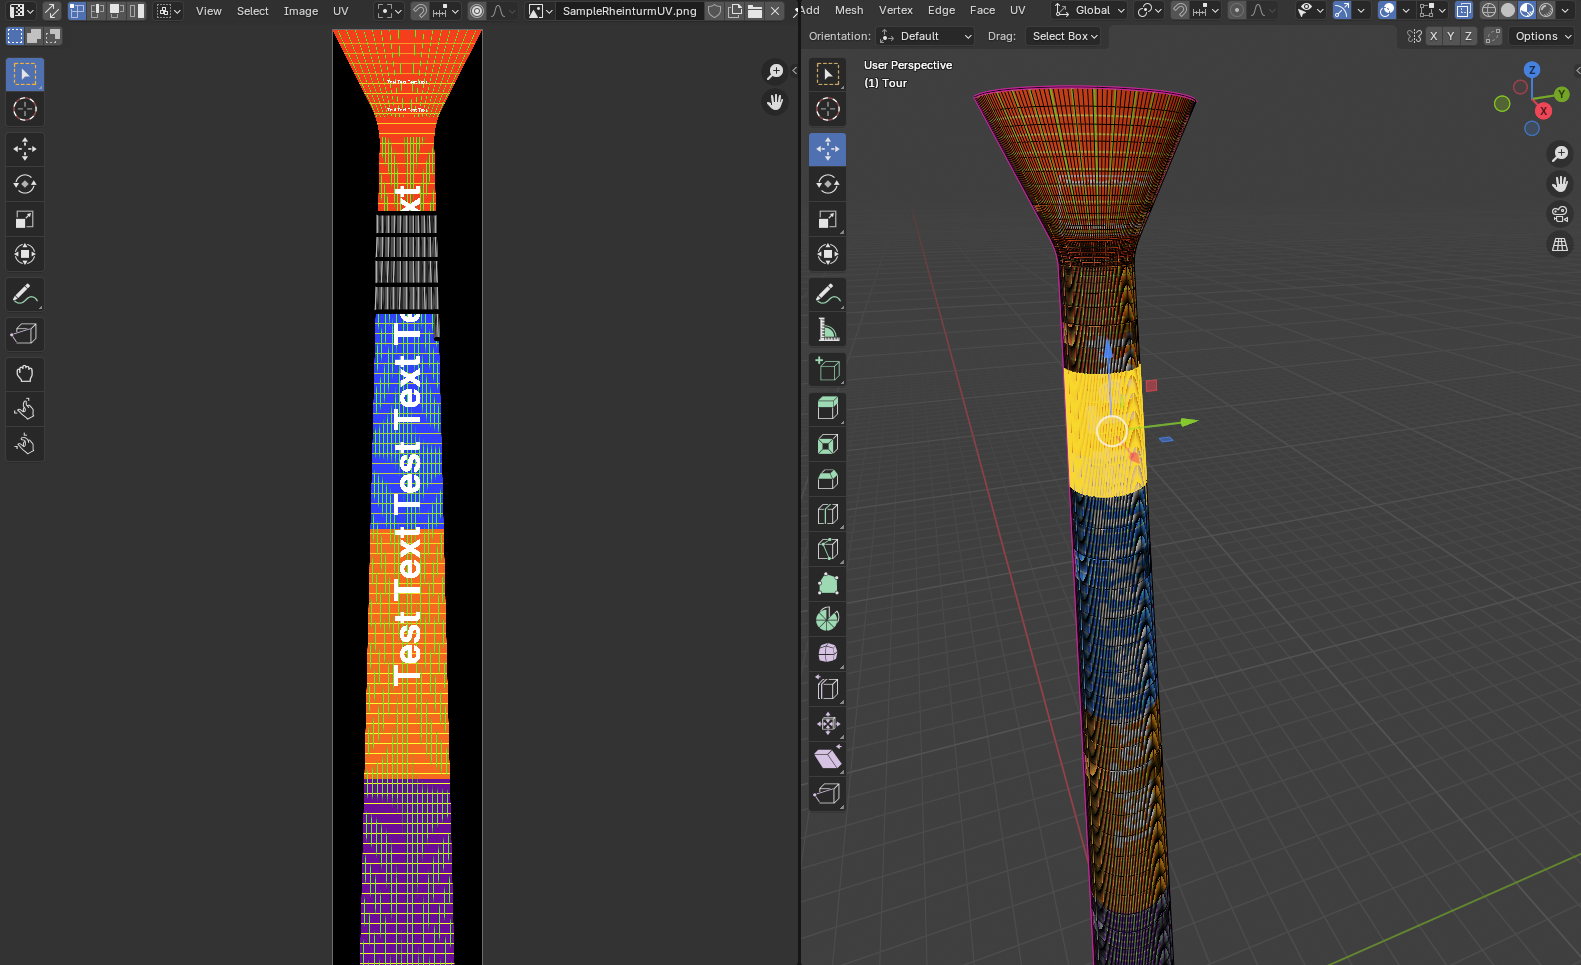
Example: Tower projection model prepared in Blender
VIOSO software provides built-in generation for several standard surface geometries: flat screen, cylinder, dome, panodome, cone, and disc.
For projection surfaces that do not match these predefined shapes, a custom 3D model can be used instead. The supported formats are:
- .Obj
- .Dae
- .Fbx
Use the checklist below to verify that your 3D model is ready for use in VIOSO.
Checklist: 3D-model for VIOSO calibration
Section titled “Checklist: 3D-model for VIOSO calibration”1. Mesh
Section titled “1. Mesh”☐ Contains the projection surface only: no frames, no extra building/environment elements, no structure or extra geometry that is not receiving projection content.
☐ Single-sided faces only
☐ Correct face normals: facing the direction of the viewer
☐ No loose geometry, duplicate vertices or faces
2. Tessellation
Section titled “2. Tessellation”☐ Sufficient subdivision for surface accuracy
☐ Smooth curved surfaces without visible faceting
☐ Consistent polygon distribution
3. UV Mapping
Section titled “3. UV Mapping”☐ Model should have a valid UV layout. It must reflects the final content mapping: coverage, orientation, texture continuity, uniformity..etc
&#xNAN;☐ UV texture test pattern available as 8 or 24-bit PNG.
Tip: you can generate free HQ grid patterns in our testpatterngenerator.com
4. Coordinate System
Section titled “4. Coordinate System”☐ Correct real-world scale. VIOSO uses millimeters, take this into account when exporting/importing.
&#xNAN;☐ Meaningful model origin defined: Place the model origin at a logical reference point. Common choices include:
- Center of the projection surface
- Center of the room
- Floor center
- Camera or viewer reference position
A well-defined origin simplifies the calibration step of virtual camera alignment and allows you to estimate precisely the pose.
&#xNAN;☐ Correct axis orientation after export. VIOSO uses X-right, Y-up, z-Backward.
Testing the model in VIOSO7
Section titled “Testing the model in VIOSO7”You can test the model in VIOSO7 free mode, without having to go through the calibration process.
- Go to main menu > Calibration > Content Spaces.
- Select “New” : name i.e “custom 3d model”, type: “3D model” then Create Empty Definition.
- A new entry will be added to the list, there you can find the “browse..” button for the model file path.
Now you can play that 3D model simply on a target monitor display:
- From the main UI, select a monitor from the “target” dropdown -> Activate
- Go to Player : + > add model item > add MRD
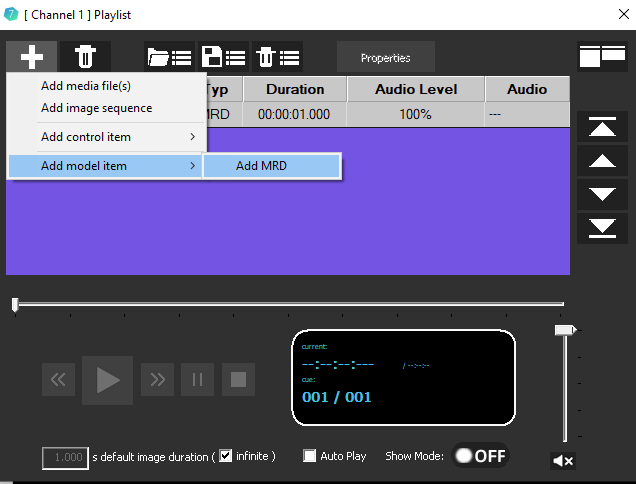
- Doube click the model item in the list to play it.
- Click on “Properties” to open the 3D model scene preview. There you can check if the mesh is displayed correctly, you can preview as wireframe or texture, switch between different patterns..etc
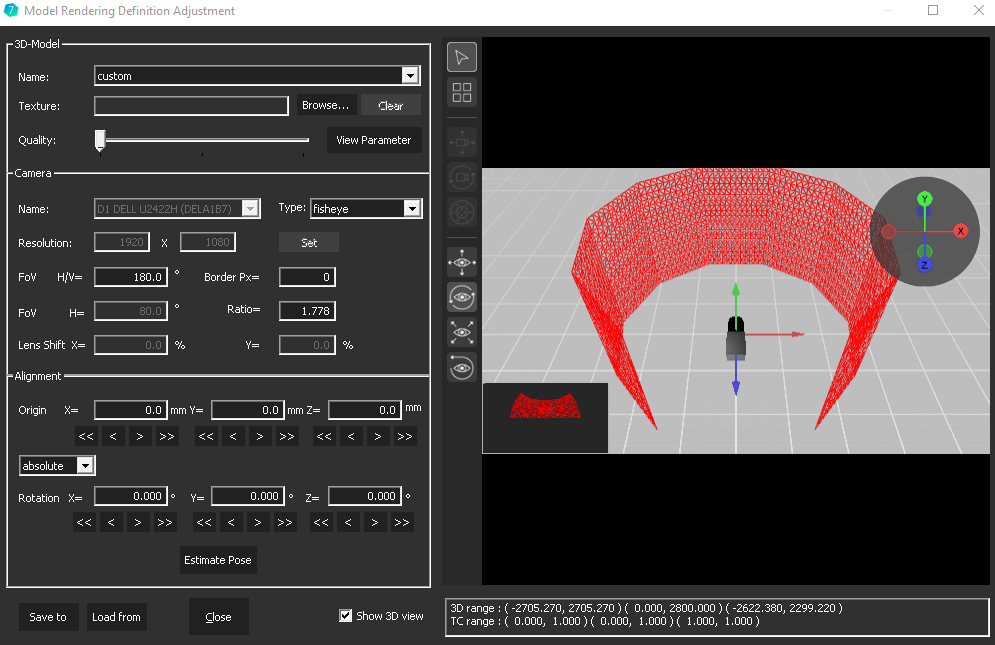
Using the model in VIOSO7
Section titled “Using the model in VIOSO7”After testing your model, you can it use in your calibration workflow: